
Launch Site Loot
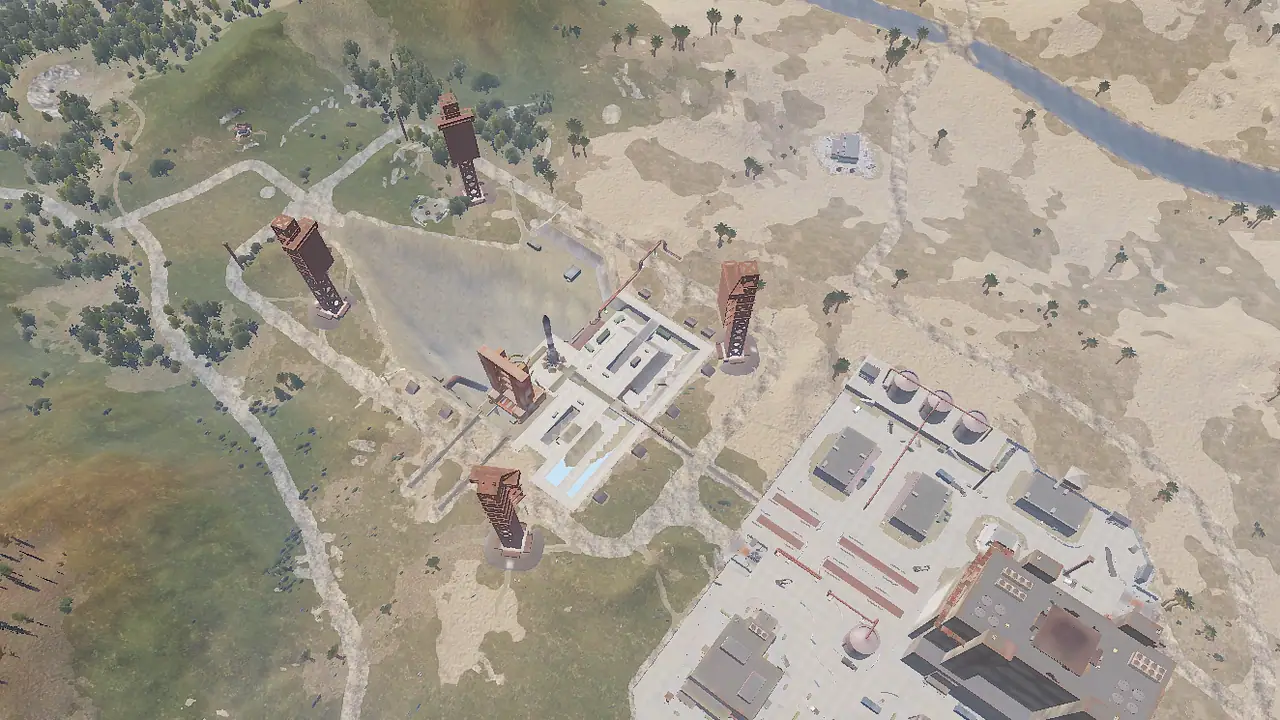
- Loot containers
- 56
- average on spawn
- Scrap from one clear
- 185
- about, every container opened once
- Radiation
- 51
- rads/s at the strongest zone
- NPCs
- 3
- at most, at full population
- Keycard readers
- 1
- 1 green
- Puzzle
- Recyclers
- Stations
- NPCs
- up to 3: Scientist. Variants: Patrol Scientist
- Arrives later
- The Bradley APC drops these when you damage it: Bradley Scientist, Bradley Heavy Scientist
- Ovens and refineries
- Safe zone
- No
- Monument area
- 400 × 200 m, 200 m tall
- No building
- 775 × 476 m area, reaches up to 463 m out
- Chinook crate drop
- No
- Patrol heli crash site
- Yes, a patrol heli shot down nearby flies here to crash
- Train tunnel entrance
- Yes
- Puzzle order
- Swipe the green card, the door opens.
- Also here
Blockers here
6 blockers| Blocker | Blocks | Explosives to clear one (sulfur to craft) |
|---|---|---|
| Barrels Long ×1 | The metal door | |
| Desks ×1 | The red keycard door | |
| Lockers ×1 | The red keycard door | |
| Terminals ×2 | 2 red keycard doors | |
| Trolley ×1 | The metal door |
Each icon shows how many of that explosive clear one blocker, cheapest first; the number under it is the sulfur to craft them. 40mm HE grenades come only from loot. 1 C4 clears any blocker, and a pickaxe mines one for its metal. Monument blockers lists every explosive and what each gives.
Launch Site loot on spawn
about 185 scrap total| Container | Count | Scrap each | Total |
|---|---|---|---|
| Crate | 16 | 5 | 80 |
| Loot Barrel | 11 | 2 | 22 |
| Loot Barrel II | 11 | 2 | 22 |
| Trash Pile | 8 | 0 | 0 |
| Military Crate | 7 | 8 | 56 |
| Oil Barrel | 2 | 0 | 0 |
| Tool Crate | 1 | 5 | 5 |
Opening everything once gives about 185 scrap. Crates respawn on the monument's own timers. What you find here lists every item they give.
Launch Site radiation
no protection worn| Zone | Tier | Radius (m) | Centre (rads/s) | Half radius (rads/s) | Protection to block |
|---|---|---|---|---|---|
| 1 | high | 11 | 51 | - | max (1/s gets through) |
| 2 | high | 11 | 51 | - | max (1/s gets through) |
| 3 | high | 11 | 51 | - | max (1/s gets through) |
| 4 | high | 11 | 51 | - | max (1/s gets through) |
| 5 | medium | 50 | 25 | - | 25 |
| 6 | low | 250 | 10 | - | 10 |
| 7 | low | 250 | 10 | - | 10 |
Rads per second. Your radiation protection subtracts from these, and the game caps protection at 50, so a zone above 50 always lets some through. What to wear names the gear that blocks it, and the radiation guide compares every monument.
What to wear
50% protection is the most that counts- Strongest zone
- 51 rads a second with nothing on. The game counts 50% protection at most, so 1 rad a second always gets through here, whatever you wear.
- Lightest that is enough
- Hazmat Suit50%Slot: whole body. Craft at workbench level 2. 1 rad a second still gets through.
- Cheap full kit
39% in all. Common or uncommon clothes made at workbench level 1 or lower. 12 rads a second still get through.
- Pills
- Anti-Radiation Pills take 75 off the radiation you have taken in, and 5 off your hydration. Use them for what still gets through.


Every piece that helps at Launch Site
| Piece | Protection | Rads through |
|---|---|---|
| 50% | 1 | |
| 50% | 1 | |
| 50% | 1 | |
| 50% | 1 | |
| 50% | 1 |
Show 23 more
Rads through is the dose at the strongest spot of the strongest zone with only that piece worn, the same figure as on the piece's own page. Pieces under 10% protection, the strongest zone of the weakest monument, are left out, as they are on the attire pages.
What you find here
283 items, average per full clear| Components 25 items | Per clear |
|---|---|
| 12 | |
| 10 | |
| 6.8 | |
| 6.5 | |
| 5.4 |
Show 20 more
| Weapons 30 items | Per clear |
|---|---|
| 0.3 | |
| 0.2 | |
| 0.2 | |
| 0.2 | |
| 0.1 |
Show 25 more
| 0.1 | |
| under 0.1 | |
| under 0.1 | |
| under 0.1 | |
| under 0.1 | |
| under 0.1 | |
| under 0.1 | |
| under 0.1 | |
| under 0.1 | |
| under 0.1 | |
| under 0.1 | |
| under 0.1 | |
| under 0.1 | |
| under 0.1 | |
| under 0.1 | |
| under 0.1 | |
| under 0.1 | |
| under 0.1 | |
| under 0.1 | |
| under 0.1 | |
| under 0.1 | |
| under 0.1 | |
| under 0.1 | |
| under 0.1 | |
| under 0.1 |
| Attachments 6 items | Per clear |
|---|---|
| under 0.1 | |
| under 0.1 | |
| under 0.1 | |
| under 0.1 | |
| under 0.1 |
Show 1 more
| under 0.1 |
| Ammo 13 items | Per clear |
|---|---|
| 3.2 | |
| 0.4 | |
| 0.4 | |
| 0.2 | |
| under 0.1 |
Show 8 more
| under 0.1 | |
| under 0.1 | |
| under 0.1 | |
| under 0.1 | |
| under 0.1 | |
| under 0.1 | |
| under 0.1 | |
| under 0.1 |
| Explosives 3 items | Per clear |
|---|---|
| under 0.1 | |
| under 0.1 | |
| under 0.1 |
| Medical 3 items | Per clear |
|---|---|
| 3.2 | |
| under 0.1 | |
| under 0.1 |
| Resources 6 items | Per clear |
|---|---|
| 185 | |
| 34 | |
| 23 | |
| 14 | |
| 0.6 |
Show 1 more
| 0.5 |
| Attire 41 items | Per clear |
|---|---|
| 0.5 | |
| 0.4 | |
| 0.4 | |
| 0.3 | |
| 0.3 |
Show 36 more
| 0.3 | |
| 0.2 | |
| 0.2 | |
| 0.2 | |
| 0.2 | |
| 0.2 | |
| 0.2 | |
| 0.2 | |
| 0.2 | |
| 0.1 | |
| 0.1 | |
| under 0.1 | |
| under 0.1 | |
| under 0.1 | |
| under 0.1 | |
| under 0.1 | |
| under 0.1 | |
| under 0.1 | |
| under 0.1 | |
| under 0.1 | |
| under 0.1 | |
| under 0.1 | |
| under 0.1 | |
| under 0.1 | |
| under 0.1 | |
| under 0.1 | |
| under 0.1 | |
| under 0.1 | |
| under 0.1 | |
| under 0.1 | |
| under 0.1 | |
| under 0.1 | |
| under 0.1 | |
| under 0.1 | |
| under 0.1 | |
| under 0.1 |
| Tools 15 items | Per clear |
|---|---|
| 0.4 | |
| 0.3 | |
| 0.3 | |
| 0.2 | |
| 0.2 |
Show 10 more
| 0.1 | |
| under 0.1 | |
| under 0.1 | |
| under 0.1 | |
| under 0.1 | |
| under 0.1 | |
| under 0.1 | |
| under 0.1 | |
| under 0.1 | |
| under 0.1 |
| Electrical 59 items | Per clear |
|---|---|
| 0.3 | |
| 0.3 | |
| 0.3 | |
| 0.2 | |
| 0.2 |
Show 54 more
| Building 30 items | Per clear |
|---|---|
| 0.3 | |
| 0.3 | |
| 0.3 | |
| 0.2 | |
| 0.2 |
Show 25 more
| 0.1 | |
| 0.1 | |
| 0.1 | |
| under 0.1 | |
| under 0.1 | |
| under 0.1 | |
| under 0.1 | |
| under 0.1 | |
| under 0.1 | |
| under 0.1 | |
| under 0.1 | |
| under 0.1 | |
| under 0.1 | |
| under 0.1 | |
| under 0.1 | |
| under 0.1 | |
| under 0.1 | |
| under 0.1 | |
| under 0.1 | |
| under 0.1 | |
| under 0.1 | |
| under 0.1 | |
| under 0.1 | |
| under 0.1 | |
| under 0.1 |
| Items 29 items | Per clear |
|---|---|
| 0.4 | |
| 0.3 | |
| 0.3 | |
| 0.3 | |
| 0.3 |
Show 24 more
| 0.2 | |
| 0.2 | |
| 0.2 | |
| 0.2 | |
| 0.2 | |
| 0.2 | |
| 0.2 | |
| 0.1 | |
| 0.1 | |
| under 0.1 | |
| under 0.1 | |
| under 0.1 | |
| under 0.1 | |
| under 0.1 | |
| under 0.1 | |
| under 0.1 | |
| under 0.1 | |
| under 0.1 | |
| under 0.1 | |
| under 0.1 | |
| under 0.1 | |
| under 0.1 | |
| under 0.1 | |
| under 0.1 |
| Traps 6 items | Per clear |
|---|---|
| 0.2 | |
| 0.1 | |
| under 0.1 | |
| under 0.1 | |
| under 0.1 |
Show 1 more
| under 0.1 |
| Food 10 items | Per clear |
|---|---|
| 2.3 | |
| 2.2 | |
| 2.1 | |
| 2.1 | |
| 2.1 |
Show 5 more
| Siege and mounted 5 items | Per clear |
|---|---|
| under 0.1 | |
| under 0.1 | |
| under 0.1 | |
| under 0.1 | |
| under 0.1 |
| Fun 2 items | Per clear |
|---|---|
| 0.2 | |
| under 0.1 |
What opening every crate and barrel above once gives, on average, most first. The figures are the ones on each item's own page. Blueprints are not counted.
Launch Site pickups
inside the monument area| Pickup | Count |
|---|---|
| Hemp | 10 |
| Mushroom | 5 |
| Wood | 5 |
| Red Berry | 4 |
| Green Berry | 3 |
| Metal Ore | 3 |
| Blue Berry | 2 |
| Stones | 2 |
| Sulfur Ore | 2 |
| White Berry | 2 |
| Sunflower | 1 |
| Yellow Berry | 1 |
Hemp, berries, mushrooms and ore you pick up by hand, counted inside the monument area right after the map loads. They spawn at random points, so this is an average and a map can have more or fewer.
Launch Site spawns and respawn times
most alive at once| Spawns | Max at once | Per respawn | Respawn |
|---|---|---|---|
Oil Barrel88% | 8 | 2 to 3 | 10 to 15 min |
Loot Barrel50% | 56 | 9 to 14 | 15 to 20 min |
| 30 | 5 to 8 | 15 to 20 min | |
| 5 | 4 to 5 | 15 to 20 min | |
Crate80% | 4 | - | no respawn timer |
A row with several items fills each spot with one of them at the odds shown. A timed row starts with one respawn's worth and adds that many each respawn until it reaches the max. Respawn times hold up to 150 players online; more players make them faster. Rows with no respawn timer fill once when the monument loads.
Methodology
Tested in game on live 4000 maps on our own server: loot containers by type (the average of 8 placed copies; containers spawn at random points, so a map can have a few more or fewer), recyclers, workbenches, research tables, repair benches, keycard readers and their tier, pickups inside the monument area, fuse boxes, NPC capacity, radiation per second and every spawner's limit and respawn time. NPCs are the monument's own guards; tunnel dwellers in a train station below and roadside scientists are not counted. No-building areas, Chinook drop zones, crash sites, train tunnel links and puzzle wiring were tested the same way. Scrap estimates use the measured average scrap per opening of each container type; a container not yet tested counts its guaranteed scrap, marked +. What you find here is each container count times the tested chance and average amount of every item in it, the same figures as the item pages. What to wear takes the protection of each piece off the strongest zone, the same figures as the attire pages. Tested on the current version of Rust.
Similar monuments
loot containersRelated pages
Launch Site: common questions
- What loot is at Launch Site in Rust?
- About 56 loot containers on spawn, the most common are Crate (16), Loot Barrel (11), Loot Barrel II (11). Opening all of them once gives about 185 scrap.
- What keycard do you need at Launch Site?
- Launch Site has 1 Green keycard reader, 1 fuse box. Bring a green keycard.
- How much radiation is at Launch Site?
- Up to 51 rads per second with no protection, across 7 zones. Clothing radiation protection lowers it. The Hazmat Suit (50% protection) is the lightest piece you can craft that reaches the 50% the game counts, and 1 rad per second still gets through the strongest zone.
- How do you get past the blockers at Launch Site?
- Barrels Long ×1: in front of the metal door; the cheapest to craft is 4 F1 Grenades (240 sulfur). Desks ×1: in front of the red keycard door; the cheapest to craft is 70 Explosive 5.56 Rifle Ammo (1,750 sulfur). Lockers ×1: in front of the red keycard door; the cheapest to craft is 70 Explosive 5.56 Rifle Ammo (1,750 sulfur). Terminals ×2: in front of 2 red keycard doors; the cheapest to craft is 70 Explosive 5.56 Rifle Ammo (1,750 sulfur). Trolley ×1: in front of the metal door; the cheapest to craft is 4 F1 Grenades (240 sulfur). 1 C4 clears any blocker, and a pickaxe mines one for its metal.
- Does Launch Site have a recycler?
- Yes, 1 green recycler.